1. Before installation, please ensure the printer is connected and turned on!
2. Double click the “mpkg” installer to begin.
3. Follow the installation steps until you receive "Installation was successful" message.
4. Click“APPLE LOGO” and go to “System Preferences” -> select “Printer & Scanners”
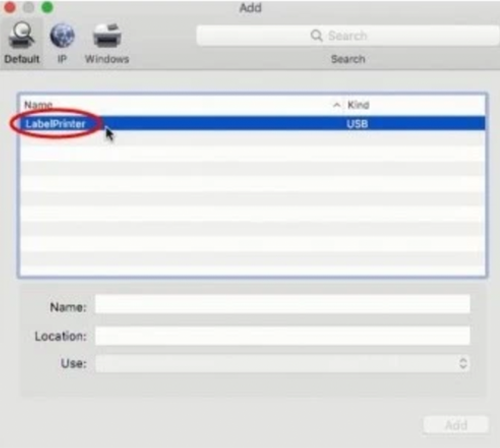
5. Click “+” to set up a printer
6. Select "Label Printer "-> click “Add”
Prepare before use
1. Open desired file (e.g. a PDF). Click“File”and choose “Print”. Select “Show Details”
2. Choose a paper size.
If the size you need is not listed, then click “Manage Custom Sizes”, input width and height, then click “OK“.
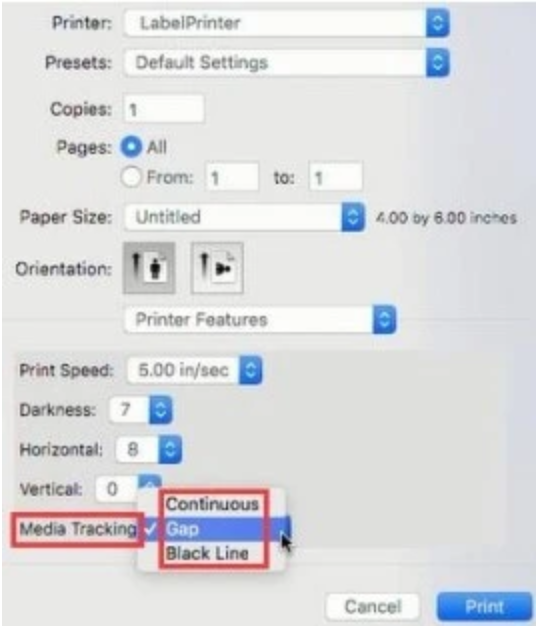
3. Select "Printer Features" in "Preview", you can set up printer properties, such as “Media Tracking”, “Darkness” and “Print speed”.
4. Select paper type in "Media Tracking". Choose from “Continuous”, “Gap” or “Black Line”.
5. Set the print density in "Darkness". Choose Darkness level (0-15). Factory default is “7”.
6. Set the print speed in "Print Speed". Choose speed (2~6 in/sec). Factory default is 5in/sec.
Help center
When the printer doesn't accept a label was printed correctly, it will attempt to re-print it.
Try the following steps to re-run “Automatic label identification” so printer can determine the label size.
1. Turn power switch off. This clears any pending print jobs.
2. Turn power switch back on. Insert label from the back of the printer. Label will be automatically caught by the printer.
3. Press and hold the Feed Button for 3 sec. Printer will move the label back and forth to determine the gap size and other properties of your label.
4. When the label is positioned at the tear off point; continue to print. It should resume printing.
Some of these suggestions may seem mundane, but often they do fix the issue.
1. Ensure the wall plug has electricity by plugging another device into that same plug.
2. Follow the power cable to the adapter and check that the cable that goes to printer is plugged in all the way into the power adapter. 3. Ensure the plug that goes into printer is fully inserted.
4. Turn the power switch off and on (I: On; O: Off). This switch is located on the back side of the printer.
The most likely reason is that the printer is connected to a new USB Port. Windows will register Label Printer as a "new" printer whenever the USB port changes.
Thus when you print to the "old" printer, it simply keeps it in the print queue.
This behavior exists so that you can run multiple Label Printers from the same computer, each with different label types and settings.
How to fix (for Windows):
Open your “Control Panel” -> go to “Printers and Devices” and note which Label Printer is "active".
It may be Label Printer, Label Printer (Copy 1), Label Printer (Copy 2), etc.
Be sure to print to the same active printer name when printing.
Or you can unplug and re-plug Label Printer into the same USB port as before and that should restore your printing without further changes.
Windows is designed to use the metric system. It should be noted that:
Many label manufacturer call their labels 4" x 6" , but they may in fact range in size from 100x150, 100x155, 100x160, etc.
For Windows, it is recommended to use millimeters as the measurement, so it will be necessary to convert from inches to mm.
To convert inches to millimeters on Google.
Didn’t find what you were looking for? Contact us.
Use left/right arrows to navigate the slideshow or swipe left/right if using a mobile device
choosing a selection results in a full page refresh